Egg Decorating Supplies and More - Demonstration by Suzanne Marrero
- Everett

- Mar 30, 2023
- 2 min read
Suzanne writes the following to the MSWG members.

I hope that guild members will invite family and friends into their shops to decorate eggs in the coming weeks.
This is a super fun and fast activity for adults and children to enjoy together.

Here is the list I promised for egg decorating supplies:
White Wooden Eggs were purchased from Amazon “SallyFashion 24 PCS White Wooden Eggs” (Amazon also sells natural wood finished eggs ready to decorate. Warning, they sell plastic eggs made by the same company!)
Crayon Eggs:
Crayola Crayons
Paper Towel (for buffing)
Bold Colored Eggs:
Alcohol Marker Set (double tipped chisel and fine)
Note: I suggest that you do not add glitter coat or other sealants to alcohol marker decorated eggs as the chemicals can react and cause the colors to bleed.
Sharpie Glitter Eggs:
Sharpie Markers
Folk Art Extreme Glitter Acrylic Glitter Finish Paint in “Hologram”
Note: Paint a thin coat of glitter finish while lathe is on a slow speed and dry with a hairdryer on a low setting.
Acrylic Painted Eggs:
Liquitex or Folk Art Acrylic Paints (thin with water as needed for desired viscosity)
Brushes
Mixing Tray or Paper Plate
Note: Dry well with a hairdryer on a low setting between color changes or paint layers.
Optional Finish: Folk Art Extreme Glitter Acrylic Glitter Finish Paint
Wonky Eggs:
Experiment with offset turning using caution and low speed settings. Alcohol markers and Sharpies work best for decorating wonky eggs.
We experimented with many ways to hold the egg on the lathe, a rubber stopper modified to cradle both sides of the egg or a drilled out golf ball worked the best.

Egg ends can be painted or decorated with a marker when removed from the lathe. This works best when the egg is perched in an egg carton, on a drying tray, or on a “bed of nails” home-made drying rack.
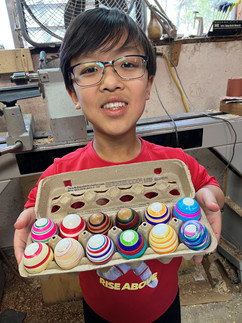
Examples of why you want to let a child color eggs on your lathe.
Above: Lucy and David Marrero
Above: Larry Sefton's 6-year-old grandson, Connor.
No lathe not problem, just buy one of these.


